Fun & Easy Spiral Paper Collage

Share
Fun & Easy Spiral Paper Collage

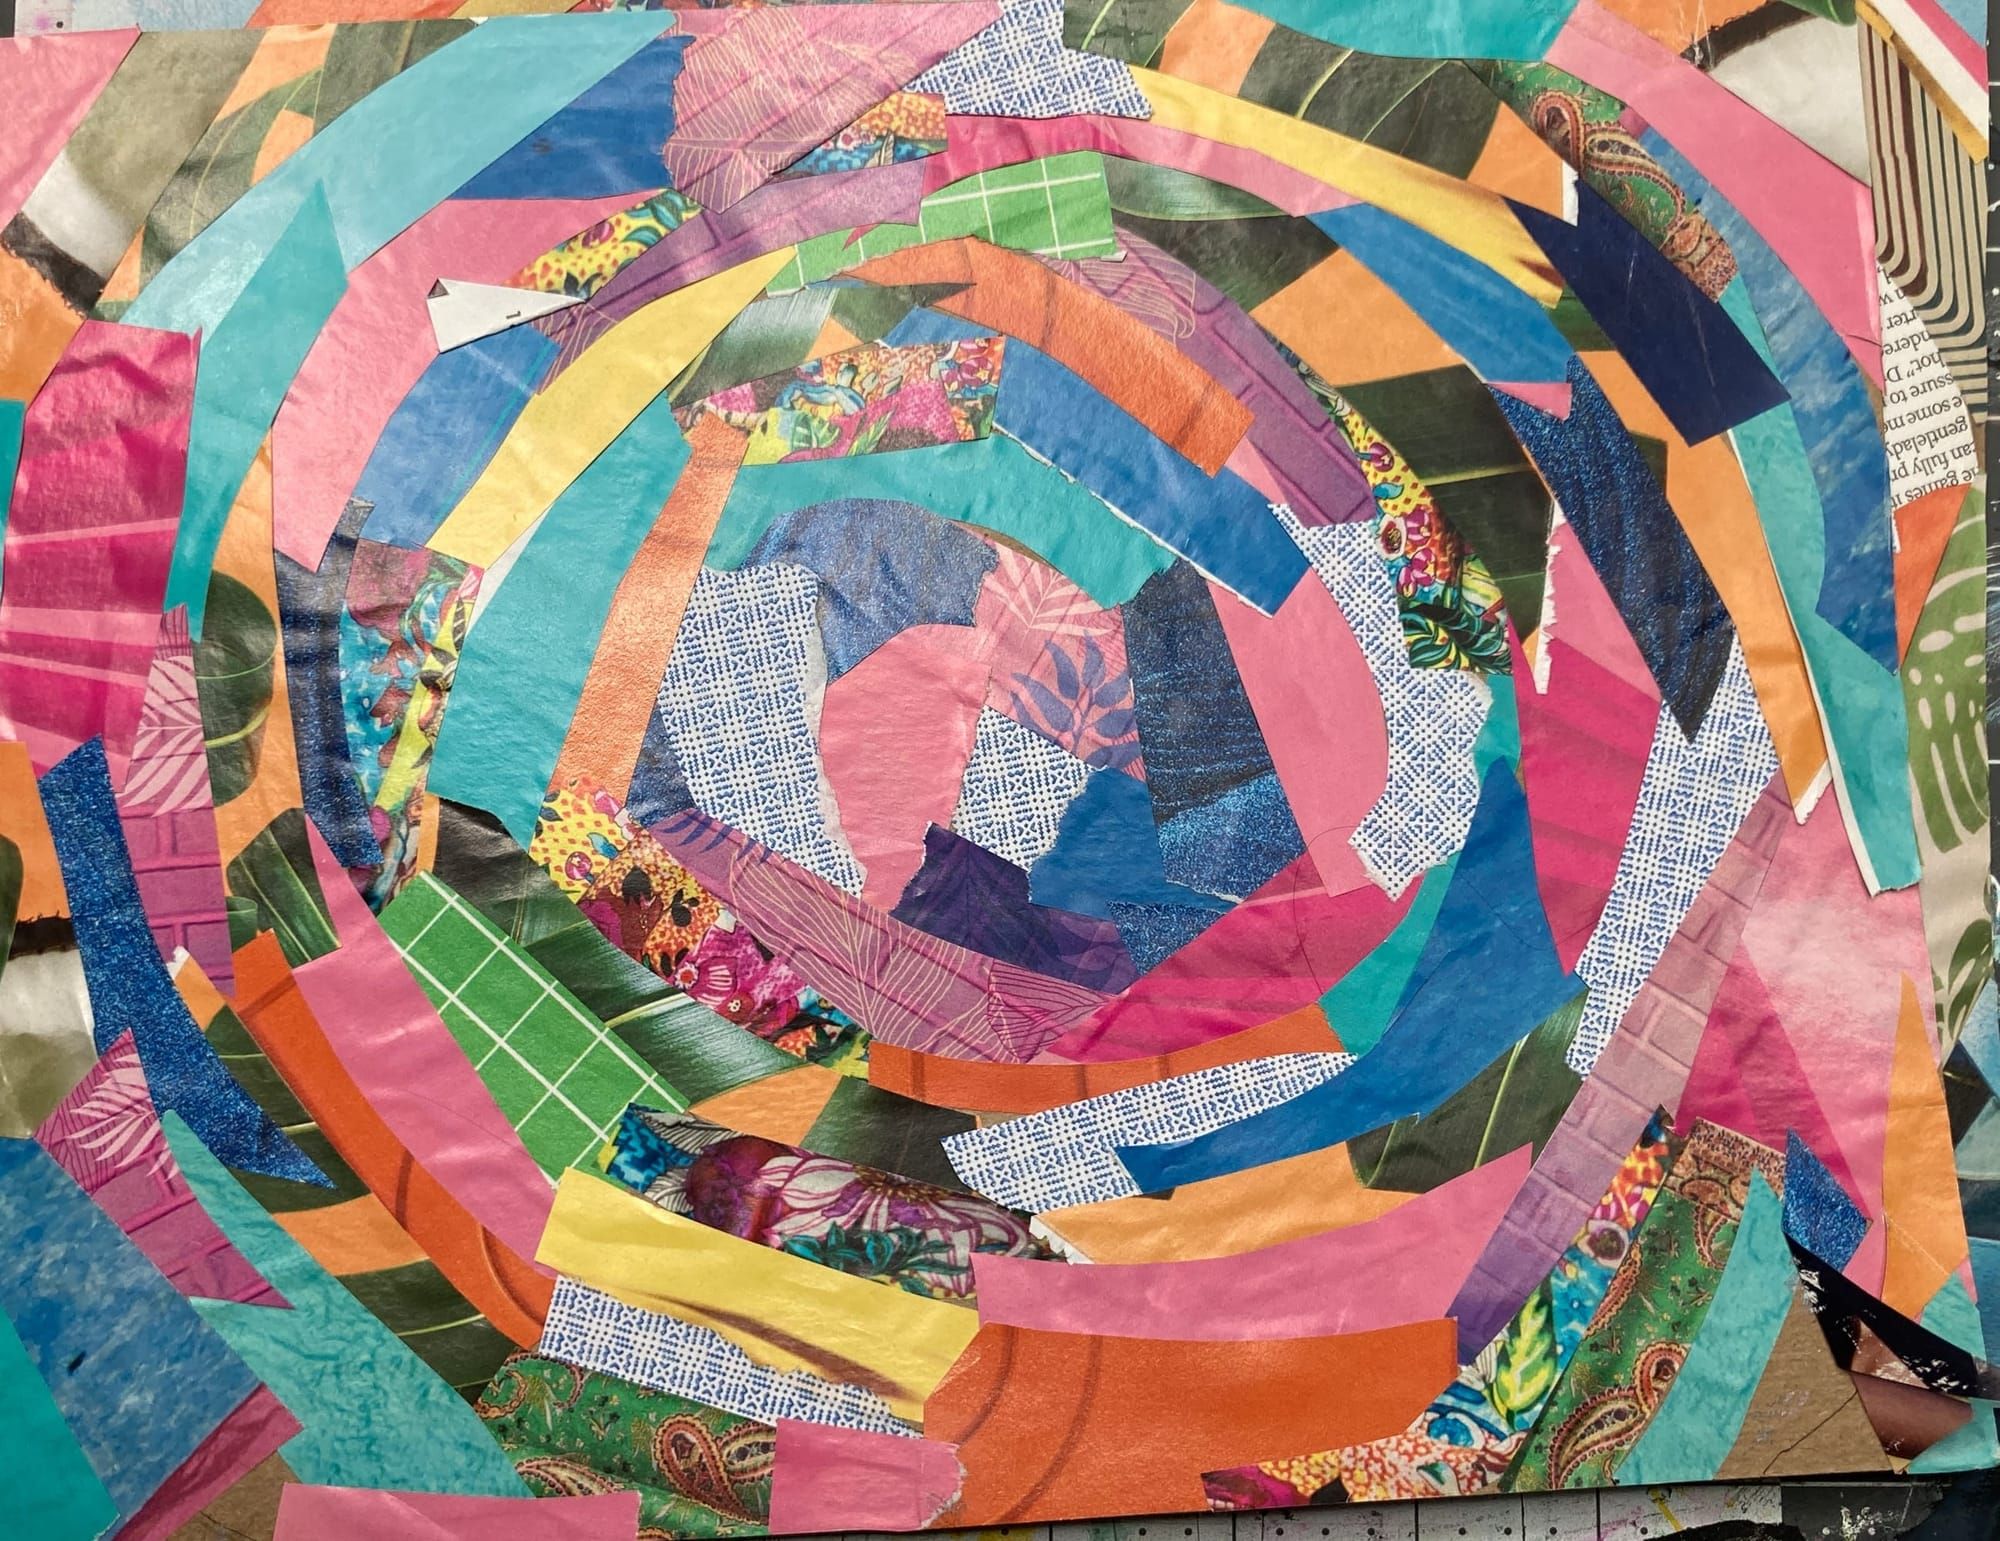
Today I have a tutorial for you on how to make this fun and easy spiral paper collage using old magazine pages.

The other day I was trying to stash bust my collection of magazines {and the collection has gotten quite out of control!} and I thought it would be fun to make sort of a spiral design using all the different magazine papers.

This spiral paper collage was so relaxing to make and I loved the result so I thought I would share a quick tutorial for you so you could try making one also!

Spiral Collage Supplies Needed

You really don't need any fancy supplies for this technique. Most likely you already have everything you need right on hand. These are what I call "elementary basics" kind of craft supplies - and this would be a super fun project to do with kids!

Collage Materials to Gather

  • Magazines - Any old magazines will do, we're looking for interesting patterns & colors not so much content
  • Cardstock or Cardboard - we'll use this as a substrate {the fancy word for "canvas" or "base" aka "what we glue everything to".
  • Scissors - You could rip & tear the paper {which I did for some sections!} but scissors make it easier to cut out rounded shapes.
  • Glue Stick - Any glue stick will work, I used Elmer's Disappearing Purple Washable Glue Sticks.
  • Pen or Pencil - to draw our spiral shape on the cardstock

If you don't have access to magazines, there are plenty of other things you could use for collage fodder - junk mail, gelli prints, painted papers, scrapbook paper, etc. I just happened to be trying to destash my magazine collection but really the sky is the limit here!

Now that we have our supplies and materials gathered, let's get onto the fun, shall we?

How to Make the Spiral Collages

Step 1: Draw a Spiral Shape on the Cardstock

This part is pretty simple. Start at the center and draw a spiral in a circle until your spiral reaches the edges of the cardstock.

Don't worry if your spiral is perfect or not - you'll be covering it up anyways, it's mostly just there as a guide so you stay on track while you glue down the collage shapes.

Step 2: Choose Some Papers

I have a lot of home and garden type of magazines which are great for interesting patterns and designs on the pages. You can also go with solid colors or even columns of text. I did a little bit of it all.

My color scheme for these are pretty bright and assorted, but you of course could go with monochrome or a neutral palette as well.

Step 3: Start at the Center & Work Your Way Out

You'll want to first start with a shape in the middle. This could be a circle you cut out {don't worry - it doesn't have to be perfect!} or you could start with a hexagon if that's easier to cut.

I'd say I made my centers about the size of a quarter roughly, although of course you could go bigger if you wanted!

Once the center is glued down, we'll work our way around using strips of paper. These can be rectangles, long triangle pieces, or you can attempt to cut shapes on a curve. I did a little bit of all three and found I really liked the variety!

You can also choose to go clockwise or counter-clockwise around the center...I worked counter-clockwise but again it's totally up to you. The important thing is you keep layering as you go around, adding to the spiral each round.

Each collage took me only about an hour to make, and like I said it was very relaxing to do - you could definitely do these while watching a movie or listening to an audiobook.

Step 4: Finish & Enjoy!

After you've worked your way around and every last bit of the substrate is covered, you are ready to finish and enjoy your work! I think these would look lovely in a matted photo frame.

If you don't want to frame them and don't like the gloss/sheen of the magazine pages, this is the point where you could finish with a matte sealant. I am a huge fan of Liquitex Matte Gel Medium for getting rid of the gloss and glare from magazine pages!